The Short Answer
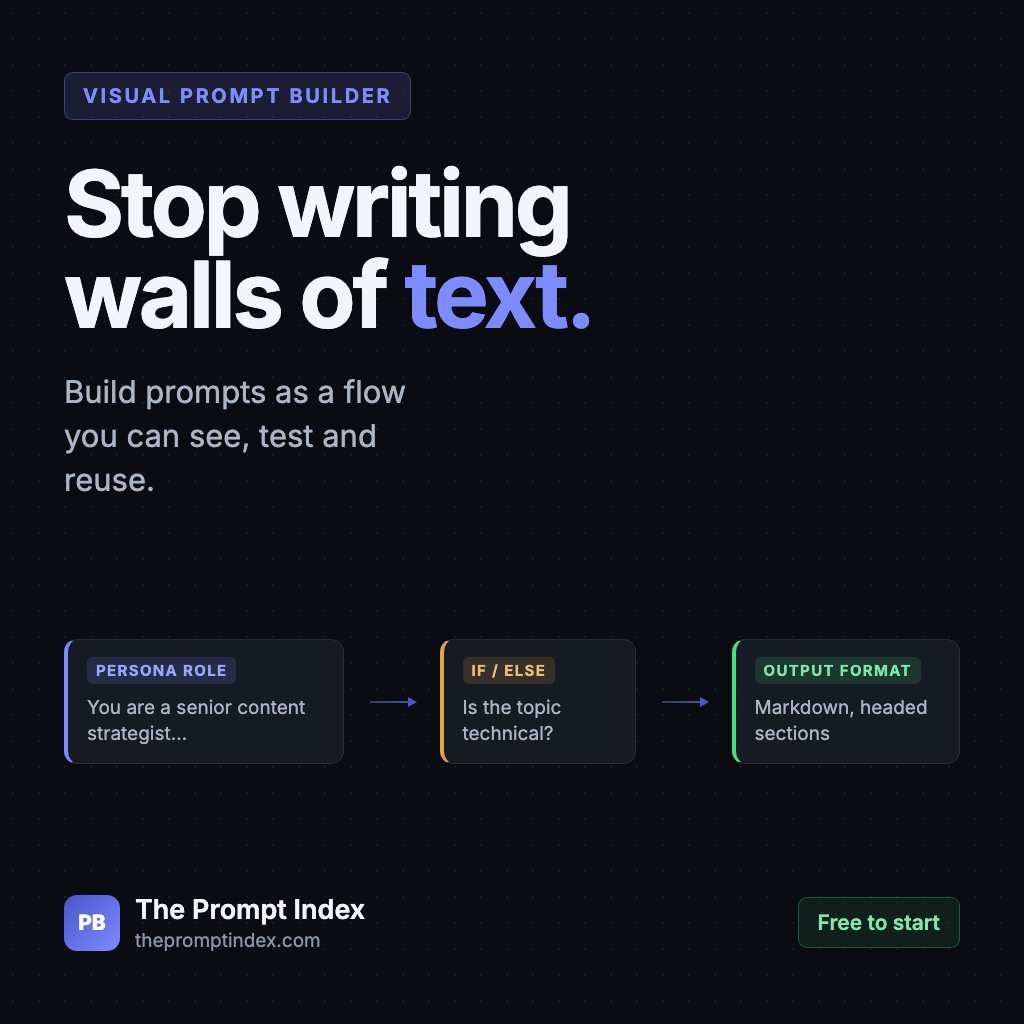
A visual prompt builder replaces one long block of prompt text with a canvas of labelled blocks — role, context, task, logic, output format — joined by connections that define the order. You edit each piece in isolation, watch the finished prompt assemble in real time, branch it with if/else logic, test it against a live model, then save and share the whole flow with your team. It exists because a wall of text hides its own structure, and hidden structure is impossible to debug.
On this page
- Why walls of text fail
- Not everyone thinks in paragraphs
- What the Prompt Builder actually is
- The block library: your vocabulary
- Workflow 1: your first prompt in four blocks
- The live preview: see it compile
- Workflow 2: add branching logic
- Testing and A/B comparison
- Save, organise, share and collaborate
- Keyboard, command palette and accessibility
- Frameworks: STAR, ReAct, chain of thought
- When not to use a visual builder
- FAQ
Why walls of text fail
Here is a prompt of the kind most people actually write:
You are an expert content strategist with 10 years of experience please write
me a blog post about the future of AI in content creation make it engaging and
professional but also accessible to beginners include some examples and make
sure it is around 900 words with headings and a conclusion, oh and if the topic
is quite technical then go deeper otherwise keep it simple, use markdown
Everything needed is in there. It still underperforms, for four reasons that have nothing to do with the model:
- The structure is invisible. There is a role, a task, a constraint, a conditional and a format instruction in that paragraph. You cannot see any of them at a glance, and neither can the person you hand it to.
- You cannot isolate a variable. When the output is wrong, which clause caused it? You rewrite the whole thing and hope. That is not iteration, it is guessing.
- Instructions collide. “Professional” and “accessible to beginners” pull in opposite directions. Buried mid-sentence, that tension is invisible. As separate labelled fields, it is obvious.
- It is not reusable. Next week you want the same prompt for a different topic. You copy it out of a chat window, hunt for the phrase to change, and hope you did not break something.
The real problem
A long prompt is not hard because it is long. It is hard because a paragraph is a terrible container for something that is really a decision tree. You are writing structured logic in a format that cannot show structure.
Not everyone thinks in paragraphs
There is a second reason worth naming plainly: the blank text box is a genuinely hostile interface for a lot of people.
Some people compose fluently in prose. Plenty of others think spatially — in diagrams, arrows, boxes and flows. Ask them to hold a five-part instruction in their head while typing it as one continuous sentence and you are taxing working memory for no reason. That is before considering anyone with dyslexia, ADHD, or anybody working in a second language, for whom a dense unbroken paragraph is measurably harder to scan and edit than the same content in labelled chunks.
The blank box also has a cold-start problem. “Write a prompt” gives you nothing to react to. A library of named blocks — Persona Role, Scenario Context, Output Format, Constraints — is a menu. Recognition is easier than recall, and a menu tells you what is even possible. Most people do not know a prompt can contain a conditional branch until they see a block called If/Else Logic sitting in a list.
None of this makes prose-writing wrong. It makes it one interface, and for a task that is fundamentally structured, often the worst one.
What the Prompt Builder actually is
The Prompt Builder is a canvas. You drag labelled blocks onto it, connect them in order, and fill in each block's fields. On the right, the finished prompt assembles in real time. Nothing is hidden: what you see compiled is exactly what gets sent to the model.
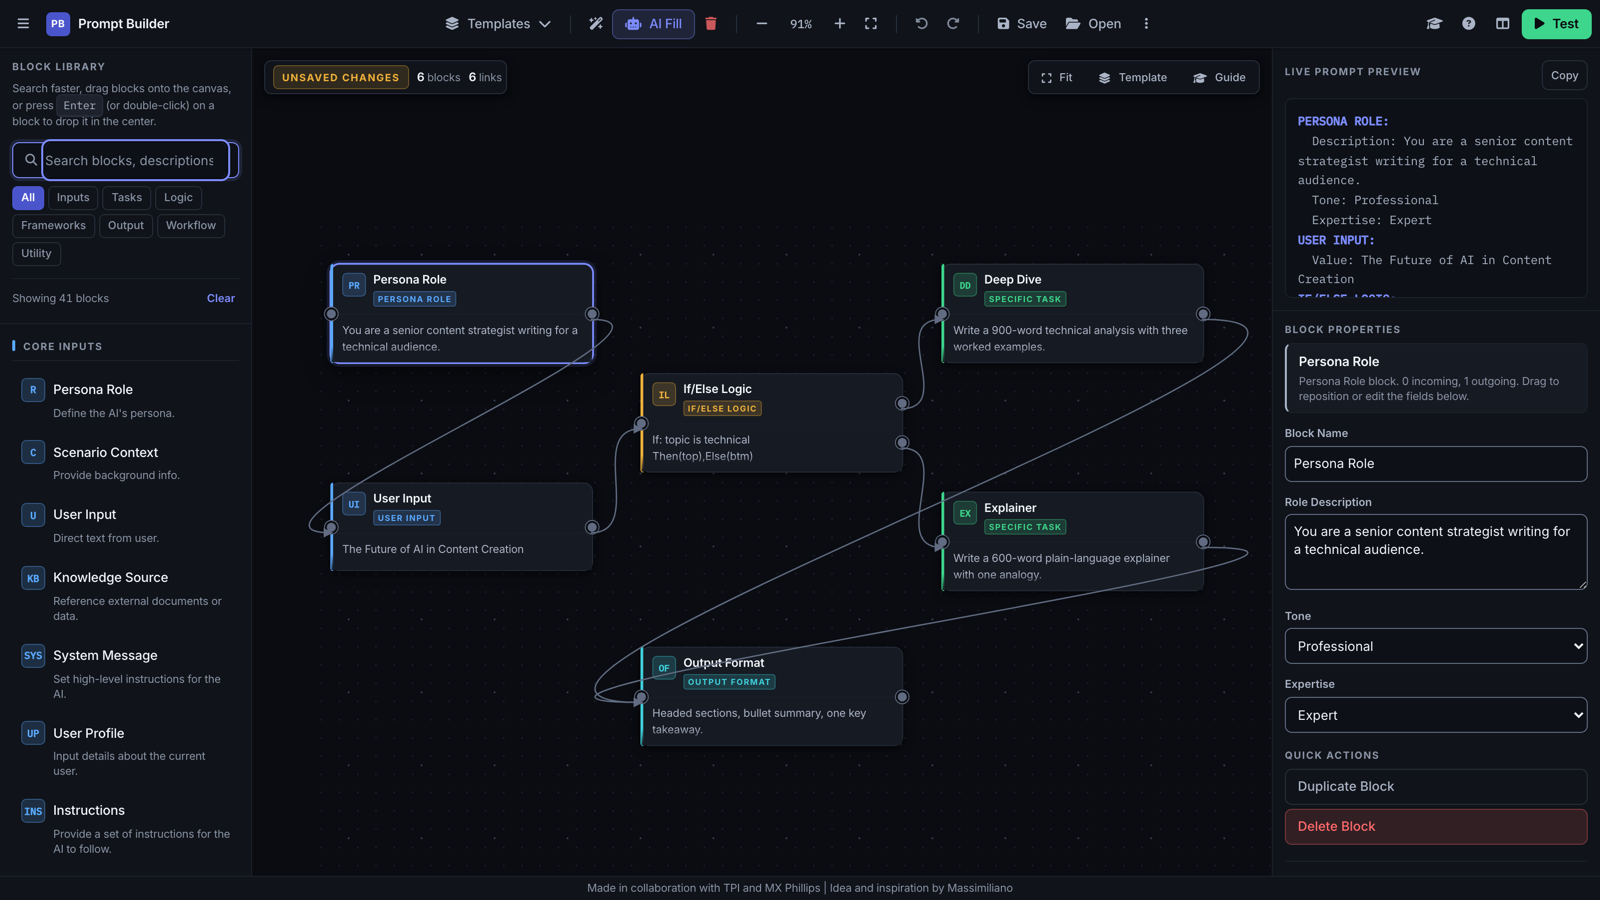
Three panels, and that is the whole mental model:
- Left — the library. 41 blocks grouped into Inputs, Tasks, Logic, Frameworks, Output, Workflow and Utility.
- Middle — the canvas. Your flow. Drag to reposition, drag from a block's edge to connect, zoom and pan freely.
- Right — preview and properties. The compiled prompt on top, the selected block's editable fields underneath.
The block library: your vocabulary
The library is the part that does the quiet teaching. Each block is a named, reusable piece of prompt engineering with its own fields.
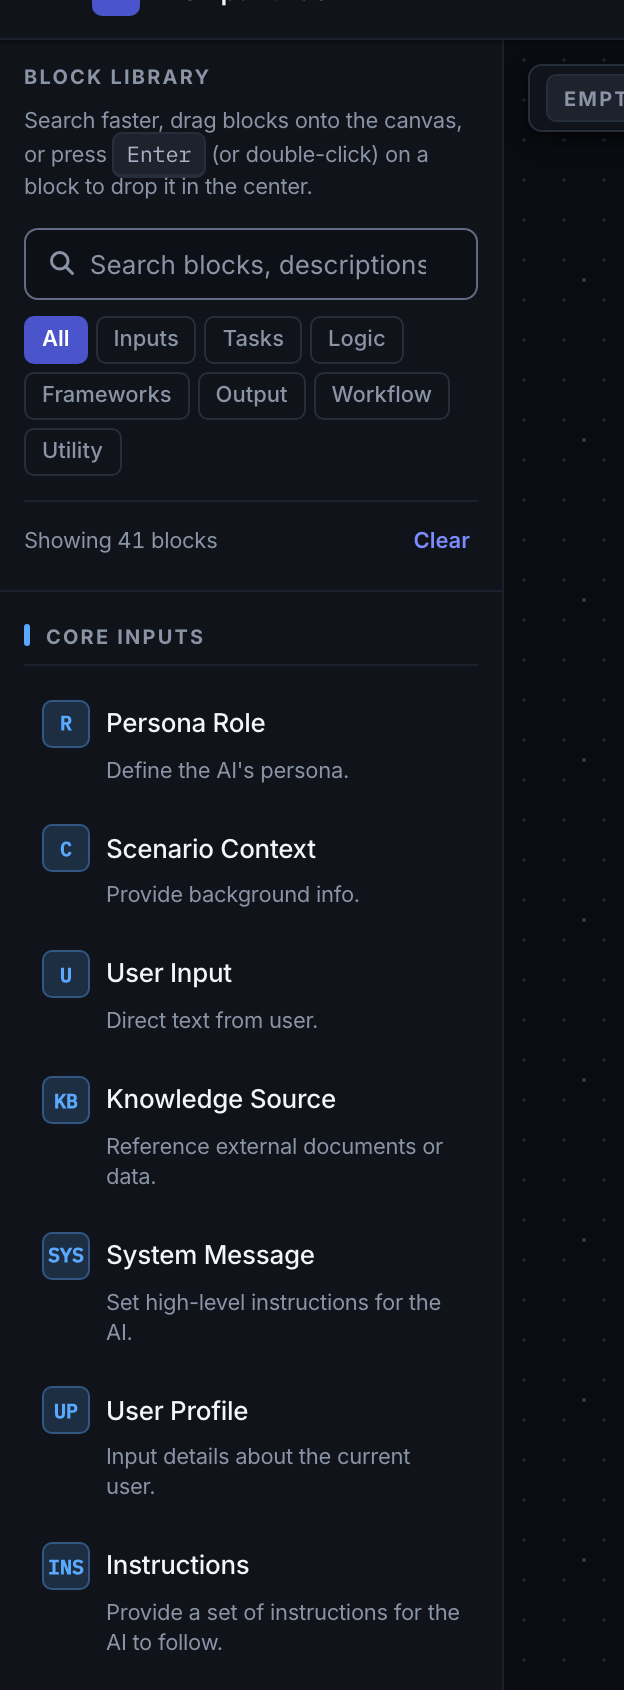
The ones you will use constantly:
- Persona Role — who the AI is being. Description, tone, expertise level.
- Scenario Context — the background it needs before acting.
- User Input — the variable part. The bit that changes each run.
- Specific Task — the actual instruction.
- Output Format — style and structural requirements.
- Constraints — the rules, one per line, and whether to enforce them strictly.
Then the ones most people never think to write by hand: If/Else Logic, Switch/Case, Iteration Loop, Tree of Thoughts, Self-Critique, Few-Shot Examples, Knowledge Source. Seeing them in a list is how you find out they exist.
Workflow 1: your first prompt in four blocks
Build this one along with the article. It takes about two minutes and produces a prompt you can genuinely use.
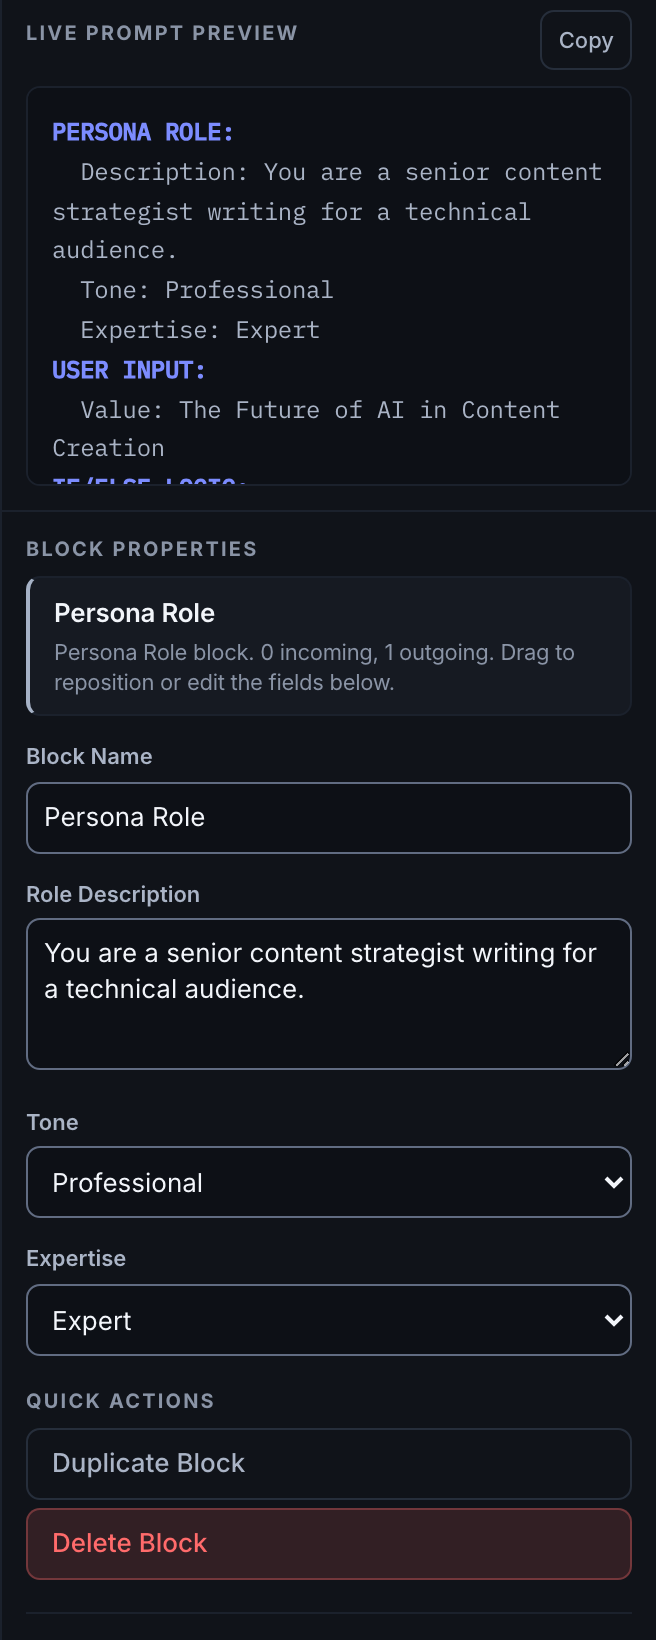
- Add a Persona Role. Double-click Persona Role in the library (or press
Enterwith it focused) and it drops onto the canvas. In Role Description on the right, put: You are a senior content strategist writing for a technical audience. Set Tone to Professional and Expertise to Expert. - Add a User Input block. This is the part you swap each time. Put your topic in the Value field — for example The Future of AI in Content Creation.
- Add a Specific Task. In Instruction: Write a 900-word article with headed sections and a short bullet summary.
- Add an Output Format. Style: Markdown. Requirements: Headed sections, bullet summary, one key takeaway.
- Connect them in order. Drag from the small circle on the right edge of one block to the left edge of the next: Role → Input → Task → Format. Prefer the keyboard? Select a block, press
c, arrow to the target, pressEnter.
That is a complete, structured prompt. Now look right.
The live preview: see it compile
The Live Prompt Preview shows the assembled prompt, updating as you type. This is the feature that changes how people learn.
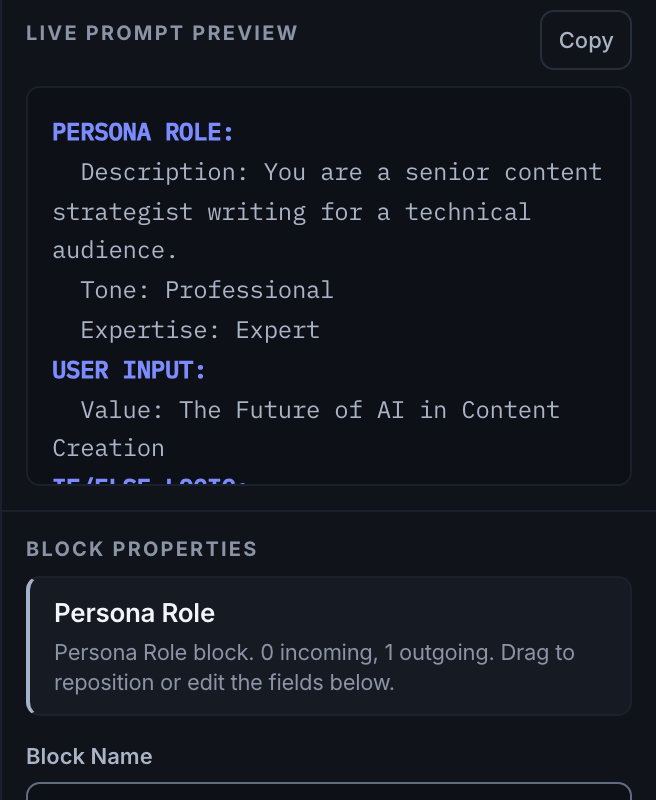
Change the Tone field from Professional to Blunt and watch the corresponding line change. Delete a connection and watch a whole section vanish. You are seeing cause and effect directly, which is exactly what a wall of text denies you. When it looks right, hit Copy and paste it into ChatGPT, Claude, Gemini or anything else — the output is plain text and model-agnostic.
Workflow 2: add branching logic
This is where a visual builder stops being a nicer text editor and starts doing something prose genuinely cannot.
Say you want one prompt that handles both technical and non-technical topics. In a paragraph that becomes a mangled sentence: “if the topic is technical then go deeper otherwise keep it simple”. On a canvas it is two visible paths.
- Add an If/Else Logic block after your User Input.
- In its Condition field: topic is technical.
- Add two Specific Task blocks. Name one Deep Dive, the other Explainer.
- Connect the If/Else block's IF output to Deep Dive, and its ELSE output to Explainer. (Keyboard: press
c, then1or2to pick the branch, thenEnter.) - Point both tasks at a single Output Format block so either path ends the same way.
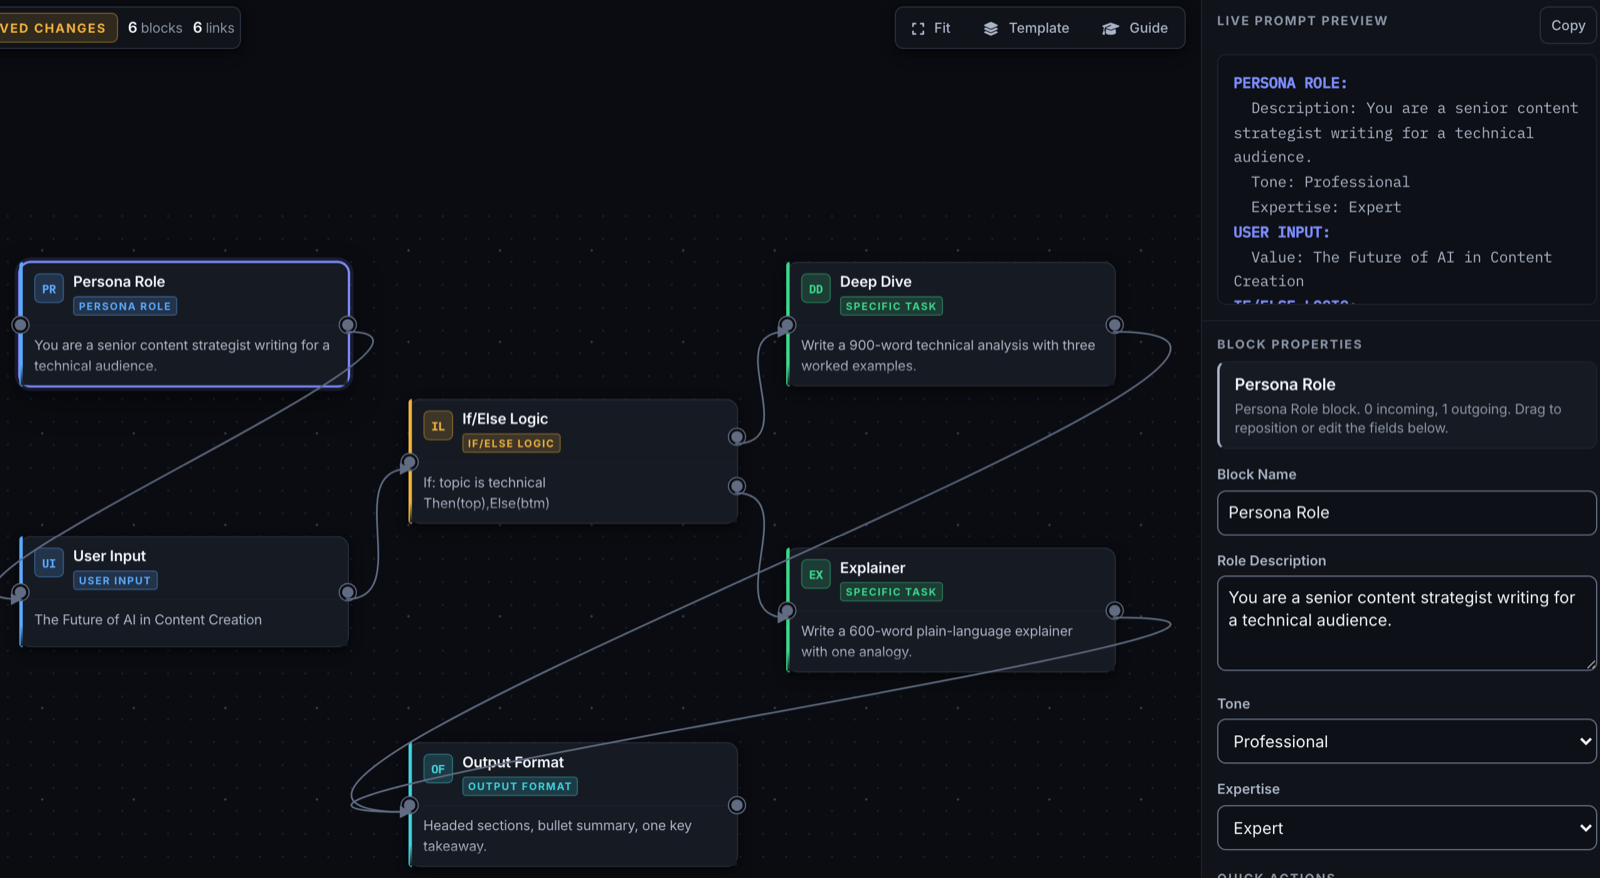
The compiled preview now emits both branches with labels, so the model receives explicit instructions for each case. More importantly, you can see there are exactly two paths and that neither dead-ends — a review you simply cannot perform on a paragraph.
The same applies to Switch/Case for more than two options, Iteration Loop for repeating over a list, and Choice for presenting fixed options.
Testing and A/B comparison
Copying into a chat window to test means losing the result the moment you tweak something. The built-in Test panel keeps the loop closed.
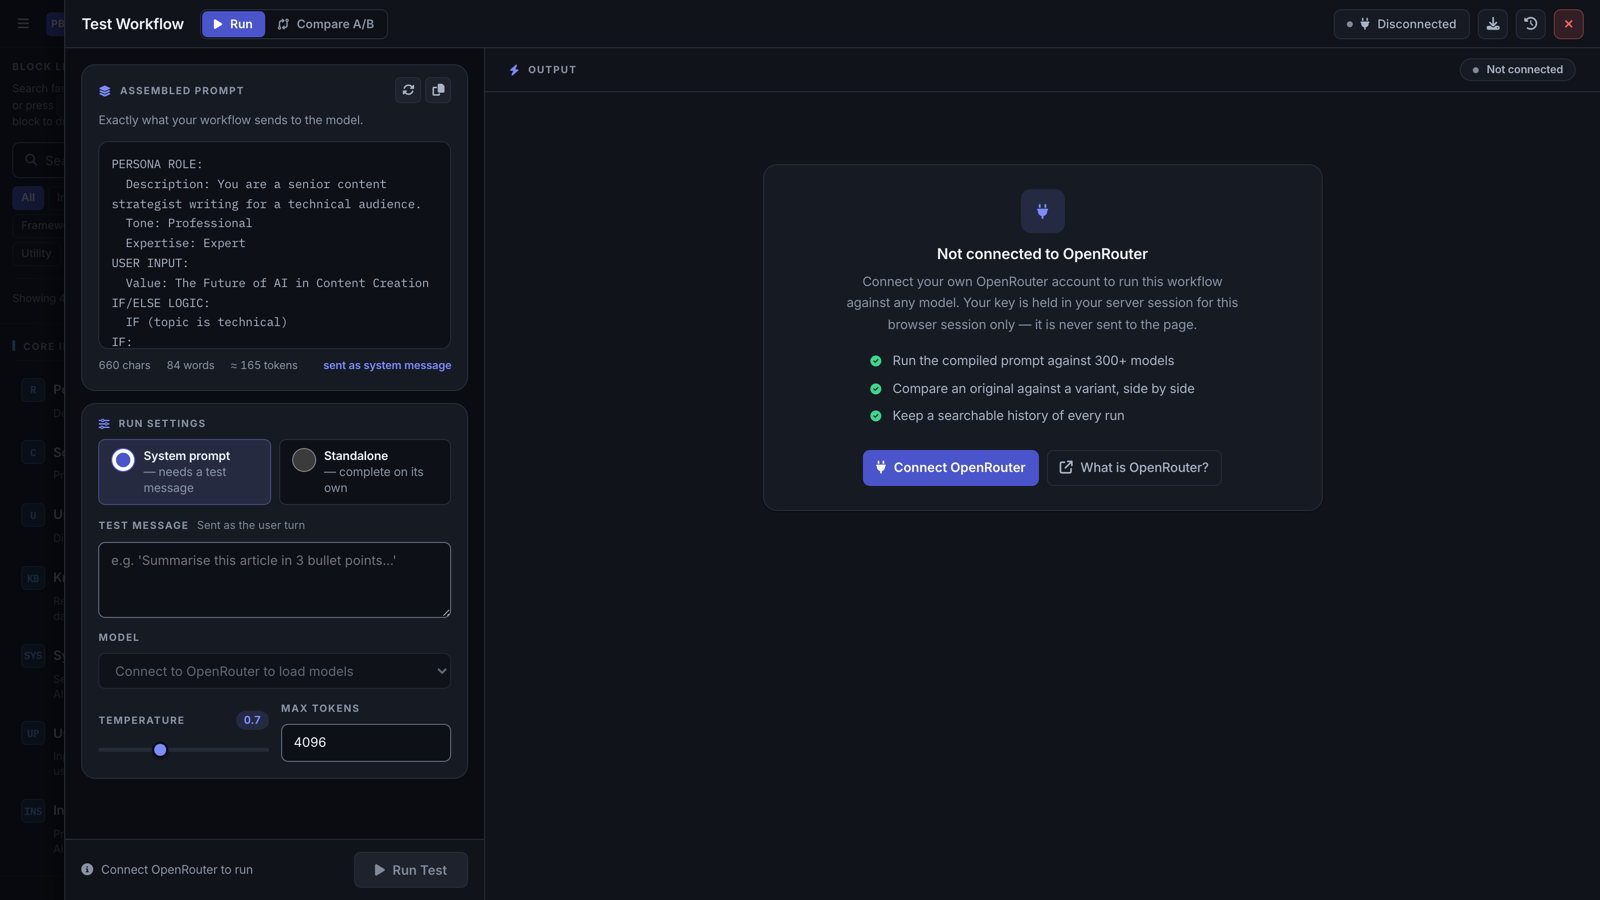
Two things worth knowing:
- You run it against your own OpenRouter account. Connect once and you can test the same workflow against a large catalogue of models. Your key stays in your server session.
- Compare A/B runs an original against a variant side by side. This is the honest way to answer “did that change actually help?” rather than trusting a vibe.
Every run is kept in Test History, so you can look back at what you sent and what came back.
Save, organise, share and collaborate
A prompt that lives in your chat history is gone. A saved workflow is an asset.
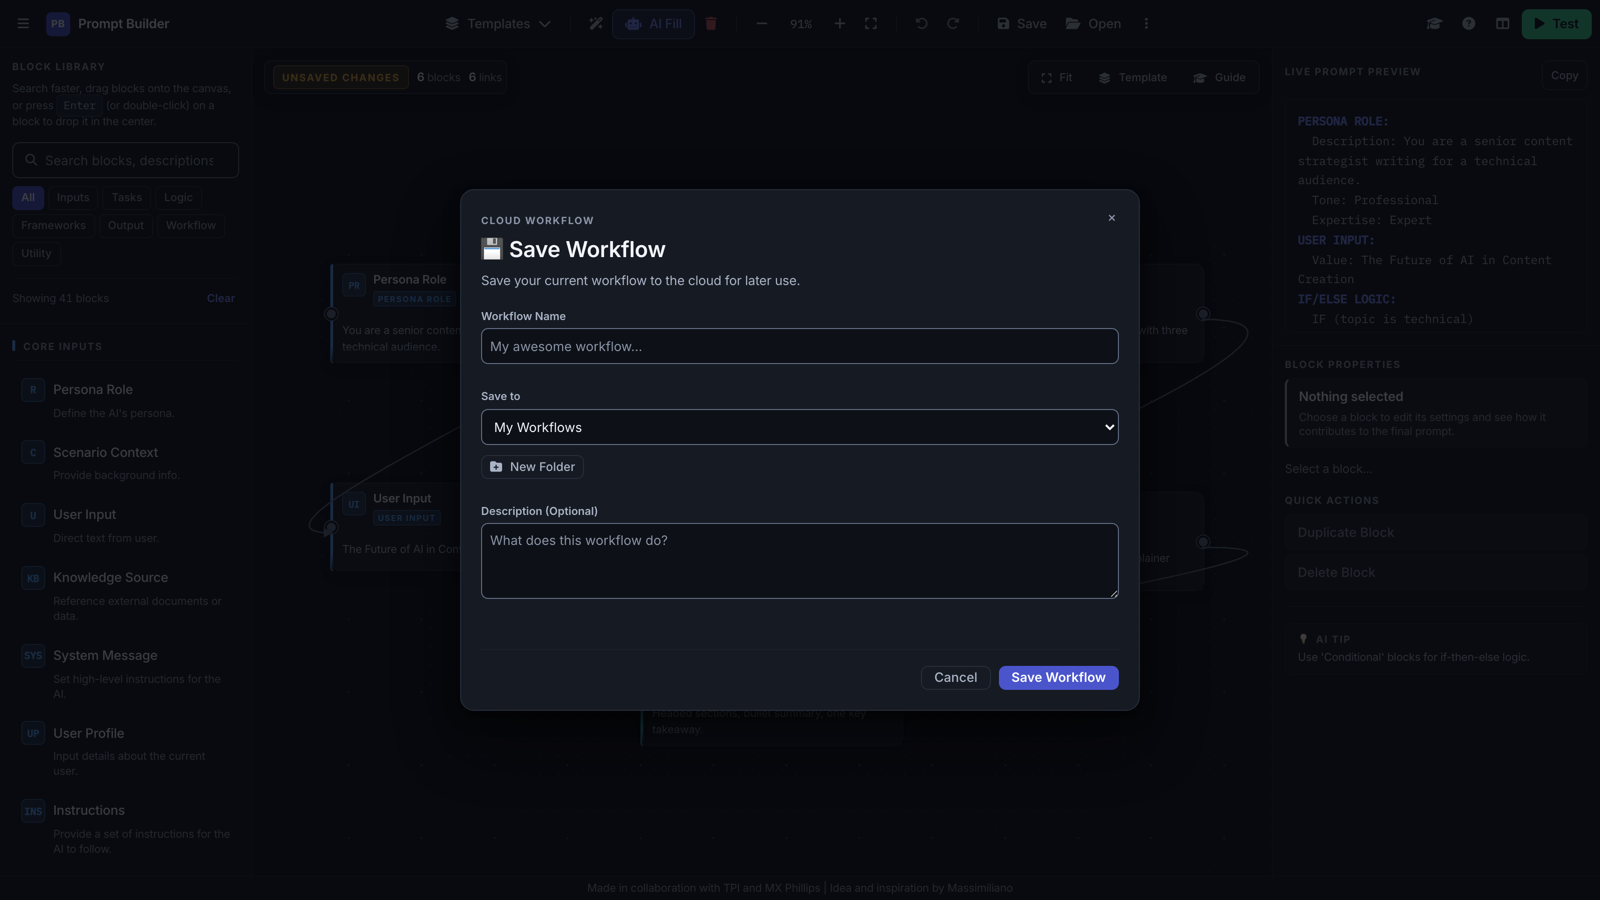
- Save to the cloud with a name and description, so future-you knows what it was for.
- Organise into folders — and team folders, so a group works from the same set.
- Share individual workflows with view or edit permission. Recipients get a working link.
- Activity feed shows who changed what, so a shared workflow does not quietly drift.
- Export and import as JSON for version control, backups, or sending a flow to someone outside your team.
A practical team pattern
Build one canonical workflow per recurring job — support replies, release notes, first-draft blog posts. Share it view-only to the wider team and edit to the two or three people who own prompt quality. Everyone else duplicates it and swaps the User Input block. You get consistency without freezing improvement.
Keyboard, command palette and accessibility
Once a tool is part of your daily routine, the mouse becomes the bottleneck. Press Ctrl/Cmd + K for the command palette: type what you want, hit Enter.
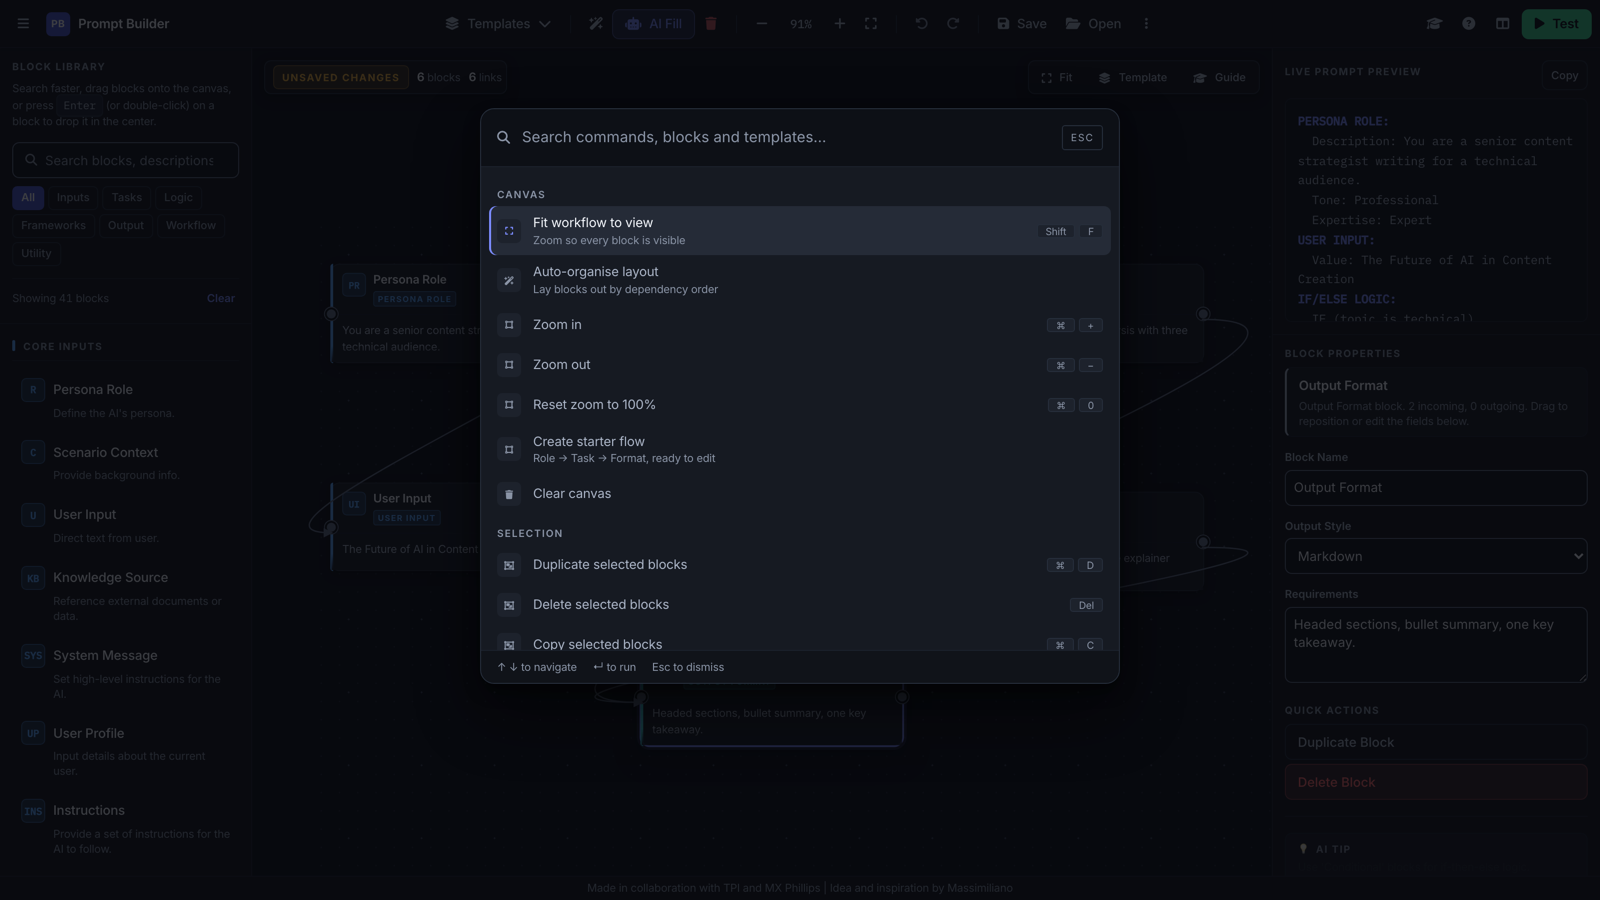
The shortcuts worth learning first:
/jump to block search ·Ctrl/Cmd+Kcommand palette ·?helpcconnect mode — arrows pick the target, digits pick a branch,EntercommitsShift+Ffit to view ·Ctrl/Cmd+0reset zoomCtrl/Cmd+Dduplicate ·Deleteremove · arrows nudgeCtrl/Cmd+Ssave ·Ctrl/Cmd+Oopen ·Ctrl/Cmd+Zundo
Blocks can be added and connected without touching a mouse, and the canvas announces what it is doing to screen readers. If drag-and-drop is difficult for you, the whole builder still works.
Frameworks: STAR, ReAct, chain of thought
The Frameworks category contains established prompt-engineering patterns as blocks with the right fields already in place:
- Chain of Thought — a thinking prompt plus whether to show the reasoning.
- Self-Critique — a critique prompt and how many improvement passes to make.
- Tree of Thoughts — branch count and the criteria used to evaluate each branch.
- STAR (Situation, Task, Action, Result) and PAR (Problem, Action, Result) — structured reasoning scaffolds.
- ReAct — reason-and-act cycles with a maximum iteration count.
- Few-Shot Examples — input/output pairs, which is often the single highest-leverage thing you can add.
You do not need to have read the papers. Drop the block in, fill the fields, read the compiled preview to see what it actually produced. That is a much faster way to learn a technique than reading about it.
When not to use a visual builder
Being straight with you: for “summarise this email”, opening a canvas is slower than just typing the sentence. A visual builder earns its keep when a prompt is long, reused, branching, or shared with other people. One-off throwaway questions belong in a chat box. Use the right tool.
Getting started
The builder is at thepromptindex.com/promptbuilder. Log in and you get a free trial of the full workspace; there is also a guided tour built into the tool that walks you through your first working prompt step by step. Start with the four-block workflow above, then add an If/Else once that feels natural.
If you take one idea from this article, make it this one: a prompt is a structure, not a paragraph. The moment you can see the structure, you can fix it.
